I recently had a Rails app with runaway memory issues.
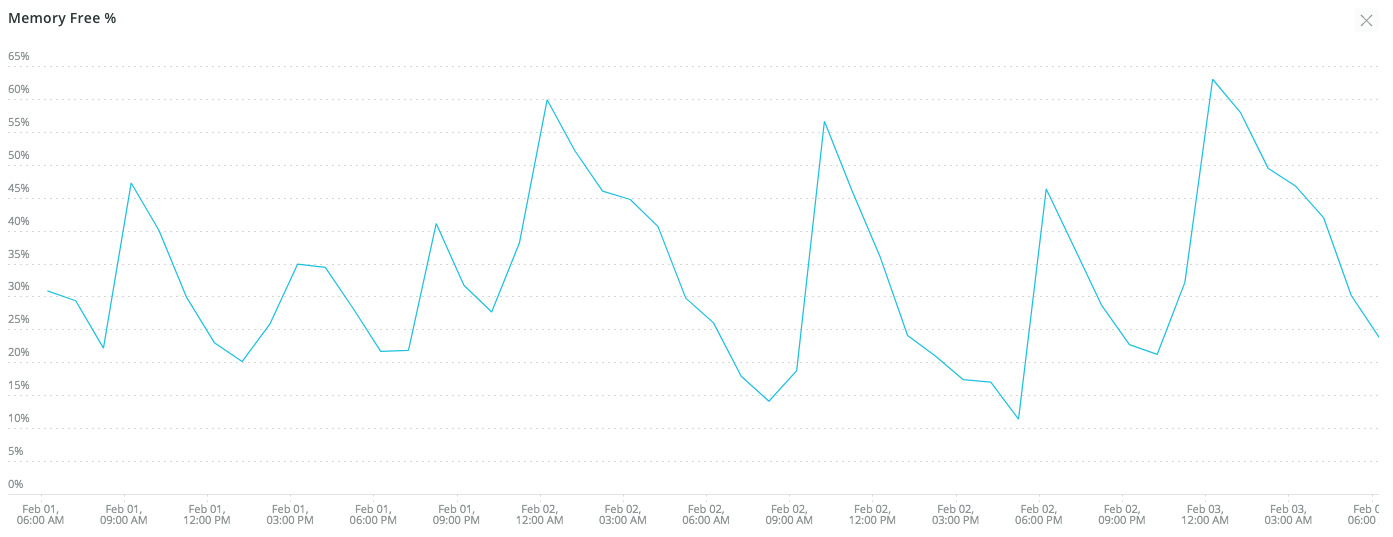
I tried some profiling and more memory-friendly gems, but it wasn’t helping enough.
During my research, I read about jemalloc which sounded really prosmising, and had done wonders on others’ projects. jemalloc is included in ruby these days, but not enabled by default. It has to be configured with a flag when ruby is installed.
Unfortunately, my app is running on AWS Elastic Beanstalk, so installing ruby was already done in the default platform image, there’s no configuration that can hook into that. However, some back and forth with support (shoutout to Aakash!) uncovered custom images (AMIs) that can be built off the default platform images to run in beanstalk.
Building a custom AMI
For this article, I’m going to be using ruby 2.7.2 on the Ruby 2.7 running on 64bit Amazon Linux 2/3.2.2 platform image.
Amazon has a good support page for this, so I won’t repeat all the details, but the gist of it is:
- Get your current image id
- Create a new EC2 instance using that image
- Make your changes
- Use that EC2 instance to create a new custom AMI
- Set Elastic Beanstalk to use your new custom AMI
Create your EC2 instance
Using the support document, build yourself a new EC2 instance using your current image.
https://docs.aws.amazon.com/elasticbeanstalk/latest/dg/using-features.customenv.html
Installing Ruby with jemalloc
- ssh into your new ec2 instance.
- Run the following commands. Some will take quite a while, so take it one command at a time.
# switch to root
sudo su
cd /tmp

# install jemalloc
sudo amazon-linux-extras install -y epel
sudo yum install -y jemalloc-devel

# get ruby
wget https://cache.ruby-lang.org/pub/ruby/2.7/ruby-2.7.2.tar.gz
tar xvzf ruby-2.7.2.tar.gz
cd ruby-2.7.2

# configure ruby to use jemalloc
LDFLAGS=-L/opt/rubies/ruby-2.7.2/lib CPPFLAGS=-I/opt/rubies/ruby-2.7.2/include ./configure --prefix=/opt/rubies/ruby-2.7.2 --with-jemalloc --disable-install-doc
make
sudo make install
Verify that it worked
After everything is complete, you can verify that ruby is running with jemalloc by running:
ruby -r rbconfig -e "puts RbConfig::CONFIG['MAINLIBS']"If you see -ljemalloc you’re in business!
You can shut down the EC2 instance and turn it into a AMI.
Switch your Elastic Beanstalk Application
This may not go super smoothly, so try it out on a staging environment.
Follow along on that support document to change your Beanstalk Application to use the new AMI you just created.
https://docs.aws.amazon.com/elasticbeanstalk/latest/dg/using-features.customenv.html
Issues
In classic beanstalk fashion, things didn’t quite work right on the first try. I had new gem and bundler issues.
In my case, I had to make 2 small changes.
In .buildspec, I needed to be more explicit with bundler versions:
- gem install bundler:2.2.7
- bundle _2.2.7_ install
And in a new .ebextensions, I needed pristine gems and another new bundler install.
container_commands:
  01_pristine:
    command: gem pristine --all
  02_bundler:
    command: gem install bundler:2.2.7
Doesn’t really make sense to me, but thats the tao of beanstalk.
When in doubt, turn on immutable deploys, destroy all your application’s ec2 instances, let it rebuild a new one, and try again. I’m sure I did that a few times too.
After that, it was smooth sailing.
Did it make a difference?
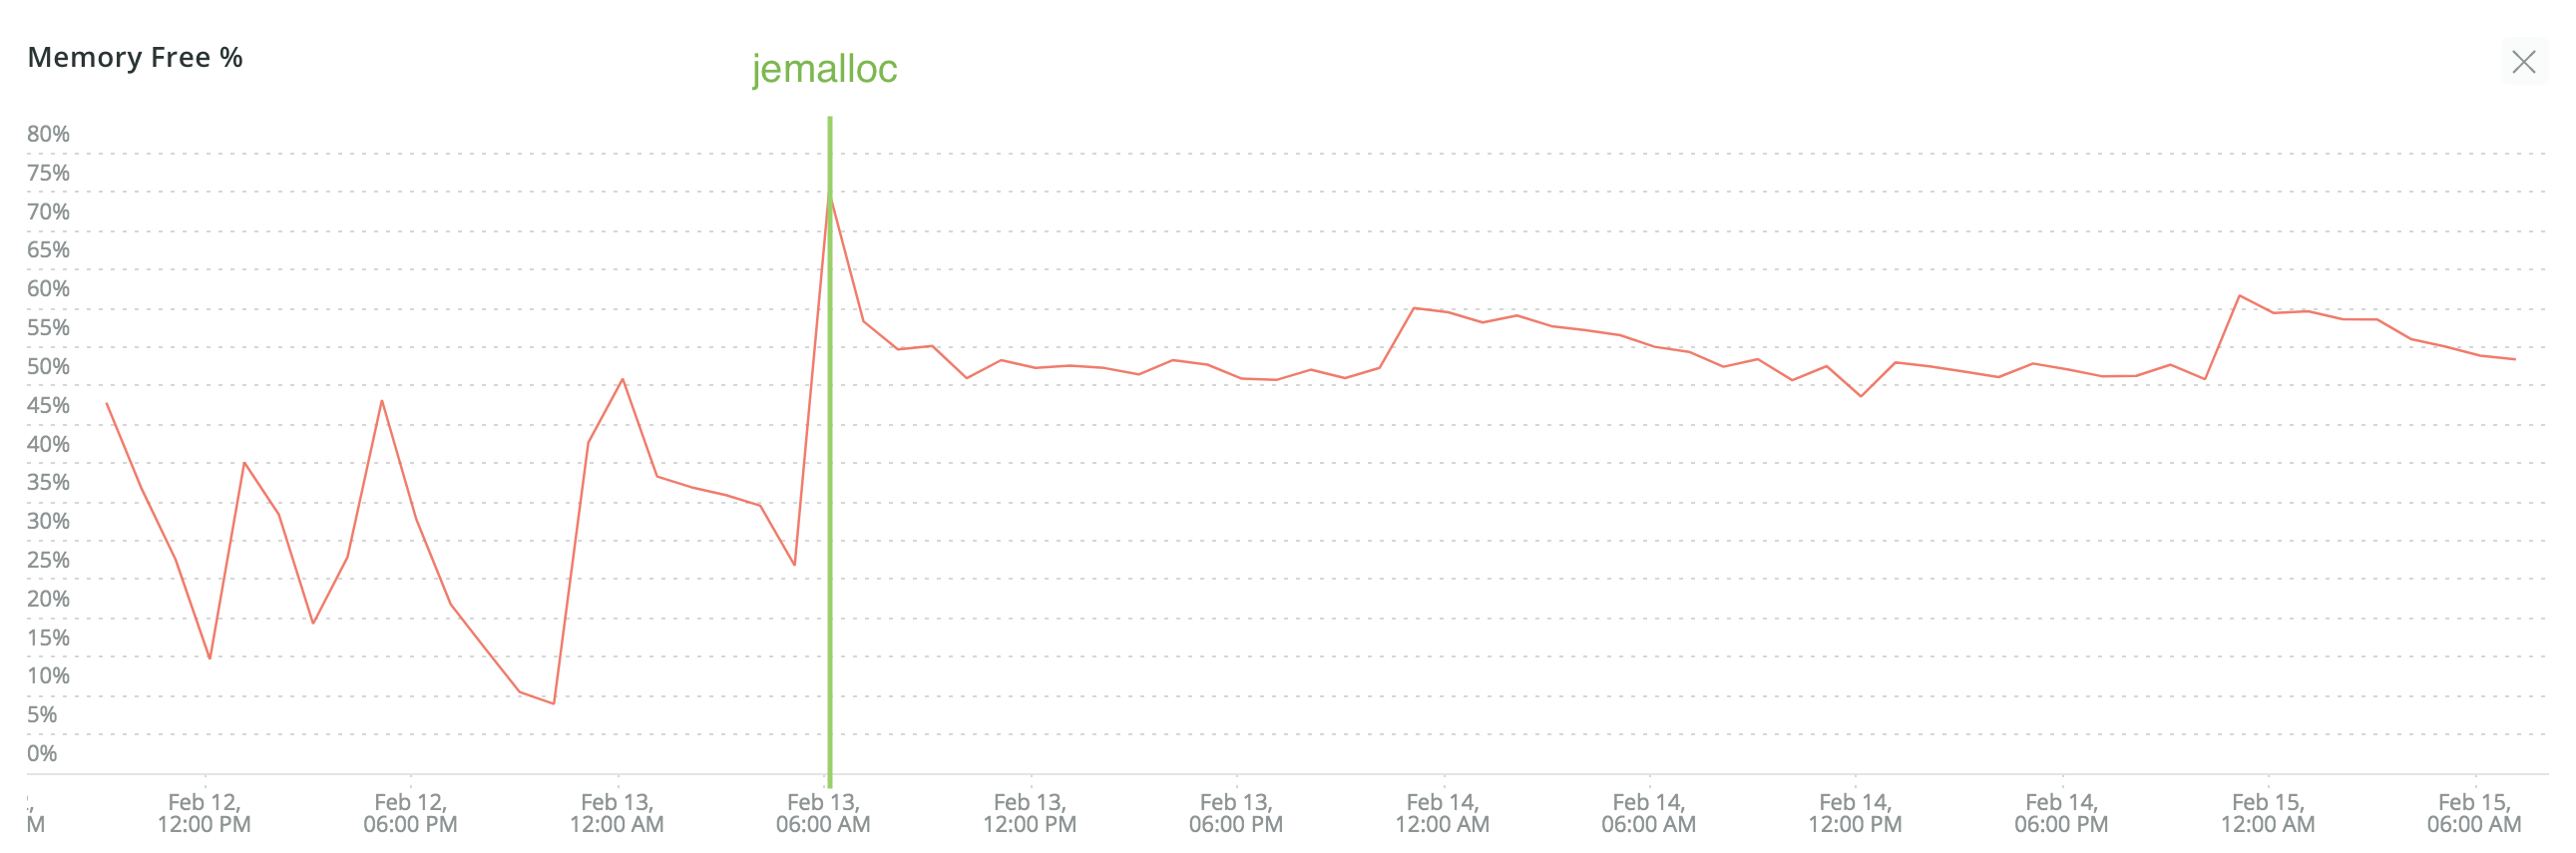
YES! Such a huge difference. Night and Day.
The Future
I expect I will have to do this again for each platform update, but for now that’s future Matt’s problem. My work here is done.
Published
Comments